Air bubbles in the oil........

Please register or login

Welcome to ScubaBoard, the world's largest scuba diving community. Registration is not required to read the forums, but we encourage you to join. Joining has its benefits and enables you to participate in the discussions.

Benefits of registering include

  • Ability to post and comment on topics and discussions.
  • A Free photo gallery to share your dive photos with the world.
  • You can make this box go away

Joining is quick and easy. Log in or Register now!

Well, Craig and Pescador, I have had two "interesting" days":D

Thursday, started stripping the fourth stage, then got called away so had to leave it.

This morning the parts arrived and I jumped into it again, pulled the head cover off, then the head and found the pressure valve was leaking, well I can suck and blow through it, I understand you should be able to blow, but not suck - either way I firgured its scrap so I changed it, the inlet valve appeared okay, but it was so tight in the head it took a lot of swearing and a bigger and bigger leverage spanner on the tool before it broke the "freeze" and came loose.

Cleaned everything up and turned my attention to the piston, tried to move it in the liner, No Go, it was "Siezed" in the liner.

So I can only assume the fourth stage was non functioning, anyway, pulled off the body and popped out the liner - I attached a pic of the piston in the liner, as you can see I am pushing with my thumb whilst holding the liner - its "siezed" solid, we even tried a bit of persuasion with a small hammer and a drift - wont budge.

Anyway, put the new valves in and the new piston and popped everything back together, then found we didnt have a torque wrench anywhere to nip everything up correctly - eventually, we got one from a friend of a friend who knew someone who dropped it off late this afternoon -but by then the cold beers at the local pub were calling loud and clear. :D and I decided to leave it until tomorrow.

I think I am just gonna tackle the entire thing and change all the valves, I relented and bought the full overhaul kit so I may as well just do it.

I think the first stage will be next, that looks simple enough, just a reed valve, but 2 and 3 appear a bit more technical so I may need some info as I progress - I hope you will keep "looking in" in case you see a caption - BIG ISSUE PLEASE HELP.!!:D

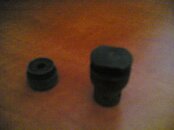
Posted a pic of the piston and the two valves, not sure you can see a sort of burn on the valves - I dont have a digital camera here so I have to use my mobile phone which is not the best for fine detail.

Anyway, how do ya think its going so far, anything I need to watch out for.?

All info is much appreciated guys - please feel free.
 

Attachments

  • 10102008.jpg
    10102008.jpg
    365.2 KB · Views: 112
  • 10102008(001).jpg
    10102008(001).jpg
    192.9 KB · Views: 99
You might be able to drive out the old piston with a brass drift and a claw hammer. If it is not galled it might be possible to save it.

When I do this kind of thing I rely on "exploded" parts diagrams. I'm not familiar with the K-14 but you should watch out for studs or set screws which impart force on the discharge valves and need to be loosened before re- assembly. Greasing the valve discs before placement helps to hold them in place. Sticking a pencil through the intake and outlet bores might help with aligning parts inserted from the opposite end. Oil up the 4th stg piston before installing. Line up the oil hole in the sleeve (bushing) when installing in barrel.
 
Last edited:
I am a little miffed today. We were assembling everything and it was all going "swimmingly" - installed the piston torqued it all down installed the fourth stage suction valve, scratched in the box for the fourth stage pressure valve - there isnt one - check the contents inventory, - its not included - it needs to be purchased seperately.!!:confused:

Now what irritates me more than ever is, its weekend and Bauer is closed, so either I re-assemble using the old pressure valve (this is the one that sits under the valve cover and just pops out with an o-ring) or I wait until monday and order it seperately which means it will arrive wednesday - thats a lot of down time.

Anyway, as we were stuck here, we quickly changed the 1st stage valve which is basic and stripped the 2nd stage down before we closed for the day.

...........But, whats your feeling on this pressure valve guys, is this a crucial part of the valve change, or do they hardly ever fail, should I just re-use the old one or get a new one - Bauer recommends changing the fouth stage valves as a pair, but only includes one in the kit - makes no sense to me.!!

Another issue is the o-ring that seals this valve was toast, so thinking there would be a new one in the kit I tossed it, I have 100 s of o-rings here but they are just the standard 70 shore butyl type - is this o-ring a special material, maybe silicone or something??

Any ideas chaps?
 
not sure if its right but i have used O ring 15.6X1.78 for the valve ok
Think i used nbr90 but it may have been viton
 
Any O ring that fits will do. Absence of that discharge valve is incredible and reprehensible. It may indicate that more than one exhaust valve design is used in the "K-14" but I presume that the kit is tailored to the unit's block no. You just told us that a person can blow air through that valve, right? It's toast. If it can be made operable by lubing or boiling or soaking in vinegar use it but order the new valve.
 
I agree Pescador, no pressure valve is not on,- I didnt bother looking through the kit first, assuming all the parts would just be there. I did give Bauer the block number, the FAD rate and the year of manufacture, so I dont know why its not here - very irritating indeed.!

Yes the pressure valve is toast, I tried to boil it but there is still no resistance in either direction, suck or blow. I will just have to order one tomorrow - Monday.

Sunday here, so everybody is lazing in the sun - I should finish the 2nd and 3rd stage tomorrow,all been well and I am not called away, then will just have to wait for the valve, although theres no hurry anymore I guess, I cant run the unit without the new valve.

Thanks Windy, yes its the right size, I checked the head orifice with a vernier - I have plenty here so I am set o-ring wise.
 
Hey widget,
Sounds like someone "robbed" that kit of the 014121 valve and N2789 o-ring to fill an order. If I recall you said that the old 014121 was passing air when you checked it!?!

I have taken this valve apart and lapped the plate when I serviced a machine in a remote location. But waiting until Wednesday would probably be easier than me trying to explain. Plus, sometimes it works and sometimes it doesn't. All depends on the condition of the valve and whether or not the spring is in good condition.

Craig
 
Hi Craig,

Yeah, I think so, nobody at Bauer can explain it -lots of excuses and buck passing, but, ultimately, 80 bucks lighter in the pocket :depressed: and I will have one wednesday.!!

No spring here Craig :D absolutely no pressure on the plates in either direction - from my limited understanding there should be downward pressure on the plates if you press up with a small pencil or something from the bottom? - but these plates are as "free as a bird" you can blow them up and suck em down, no resistance - I think the spring has corroded away in this unit.!

.......But I would be interested to know how you lapped the plates, can you get them out of the unit?? - I sort of thought it was sealed?

What would be a fair hour value running time for the final stage valves Craig - I see Bauer says a max of 1000 hours per valve set, but our conditions here are hot and humid - will this effect the hours by much?

Just wondering as I want to start a log book for the two units - nobody has bothered before, but I think it will be usefull to see how long things are really lasting.
 
The 014121 is "press fit" together and there is a less than 50% chance it can be separated. I don't know for sure, but I believe the inlet valve has the same plate and spring. It is also "press fit".

As far as when valves should be changed, most of the folks I used to do service for ran the machines until they broke. Preventative maintenance was an unknown phrase to them. Although this is not something you will find is most compressor MFGs manuals for their continuous duty machines, I believe that to not have excessive wear, a machine should be able to do the job in 3-4 running hours, or it is too small.

Craig
 
Hi Widget,

Like Craig, I too have taken the final stage valve apart albeit on a Bauer Junior a few years ago. Basically the same I would think as the K 14. What I did was to place the valve on a suitably sized nut that allowed the seat part to fall inside the nut but supported the upper section with the holes in it. I then used a piece of welding rod and carefully punched around the holes till the two parts separated. The valve spring which was broken was replaced by manufacturing another through the use of a modified ballpoint pen spring which I cut approx. 1/4 inch long and reformed into a conical shape as the original so that it collapses into itself similar in appearance to a clock spring. Lapping the valve disc or seat if necessary and then pressing the body together again in a simple bench vice. This repaired valve has lasted longer than the two other bauer valves that we bought.

I also own a silenced K14 Verticus with all the options, but have not needed to replace/ fix the valves yet......but I know what I'll be doing when the need arises.

Anyway you can read about how reliable the fix is on Michael McFadyens Scuba web site and click on Bauer Compressor link. Good luck.

Heinz
 

Back
Top Bottom