


I have made a few different backplates and single tank adapters in the past. The details of those projects can be found at these two links.
http://www.scubaboard.com/forums/do-yourself-diy/235657-backplate-sta.html
Backplate and STA - The Dive Matrix Forums
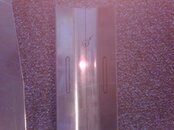
I have put together some blanks for the backplates. They are 1/8" aluminum, and are cut to the basic outline. I have marked the center line on the plates, and located (center punched) the bolt holes. They are 11" on center.
For a DIY project, you still have to mark and drill the remaining, webbing slots, and perimeter holes if desired. These still need to be bent, any sheet metal shop or fabrication shop in your town can bend them for a low cost.
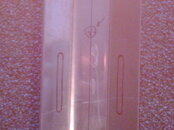
The single tank adapter has already been bent for you, the bolt holes have been located and center punched. The cam band slots have already been marked for you. The bend angle of the single tank adapter will be the same bend angle for the center of the back plate, so you have the STA as a bend reference for the back plate.
This is a fairly easy DIY project. The holes are easily drilled with a cordless drill. the slots can be chain drilled with the same cordless drill and drills (drill bits).
After chain drilling the slots, clean and de-burr with a file or dremel tool.
The STA is also 1/8" aluminum.
This is a great DIY project. Aluminum is easily worked with home shop tools.
I've taken care of the hardest part, which is getting the material, and cutting the basic outline. I've even located and marked the bolt holes for you.
The rest is up to you. See the links above for how I did my own projects. There are plenty of others that have done back plate projects as well. Search the forum for more details on how to do it.
These kits are only $30, including shipping. This is for the plate and the already bent Single tank adapter.
I would post this in the classified section, but since this would only be of interest to those interested in a do it yourself project, I listed it here. If this post needs to be moved from this sub-forum, please do so.
The dimensions of the back plate blank is: 15 3/4" tall X 11 1/4" wide X 1/8" thick.
Single tank adapter dimensions: 15 3/4" tall X 4" before bending (4 3/16" after bending) X 1/8" thick.
PM me if you are interested.
-Mitch
http://www.scubaboard.com/forums/do-yourself-diy/235657-backplate-sta.html
Backplate and STA - The Dive Matrix Forums
I have put together some blanks for the backplates. They are 1/8" aluminum, and are cut to the basic outline. I have marked the center line on the plates, and located (center punched) the bolt holes. They are 11" on center.
For a DIY project, you still have to mark and drill the remaining, webbing slots, and perimeter holes if desired. These still need to be bent, any sheet metal shop or fabrication shop in your town can bend them for a low cost.
The single tank adapter has already been bent for you, the bolt holes have been located and center punched. The cam band slots have already been marked for you. The bend angle of the single tank adapter will be the same bend angle for the center of the back plate, so you have the STA as a bend reference for the back plate.
This is a fairly easy DIY project. The holes are easily drilled with a cordless drill. the slots can be chain drilled with the same cordless drill and drills (drill bits).
After chain drilling the slots, clean and de-burr with a file or dremel tool.
The STA is also 1/8" aluminum.
This is a great DIY project. Aluminum is easily worked with home shop tools.
I've taken care of the hardest part, which is getting the material, and cutting the basic outline. I've even located and marked the bolt holes for you.
The rest is up to you. See the links above for how I did my own projects. There are plenty of others that have done back plate projects as well. Search the forum for more details on how to do it.
These kits are only $30, including shipping. This is for the plate and the already bent Single tank adapter.
I would post this in the classified section, but since this would only be of interest to those interested in a do it yourself project, I listed it here. If this post needs to be moved from this sub-forum, please do so.
The dimensions of the back plate blank is: 15 3/4" tall X 11 1/4" wide X 1/8" thick.
Single tank adapter dimensions: 15 3/4" tall X 4" before bending (4 3/16" after bending) X 1/8" thick.
PM me if you are interested.
-Mitch
Attachments

Last edited:
")
