Photomatrix HDR for an underexposed picture

Please register or login

Welcome to ScubaBoard, the world's largest scuba diving community. Registration is not required to read the forums, but we encourage you to join. Joining has its benefits and enables you to participate in the discussions.

Benefits of registering include

  • Ability to post and comment on topics and discussions.
  • A Free photo gallery to share your dive photos with the world.
  • You can make this box go away

Joining is quick and easy. Log in or Register now!

Larry C

Contributor
Scuba Instructor
Messages
3,221
Reaction score
150
Location
SF Bay Area
# of dives
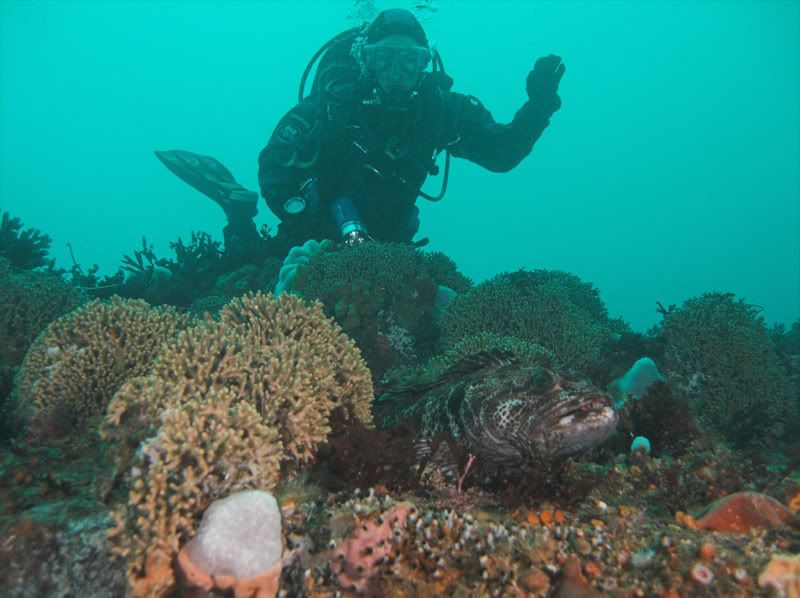
I finally got my wife and permanent dive buddy to pose for me behind a scene! I had a beautiful Lingcod in a bed of Staghorn Bryozoan, on top of a rock, and spotted Carol behind the rock. I carefully motioned her to pose behind the scene and reset my camera for a wide shot. Unfortunately, I hadn't changed those settings since Utila and shot at 1/125. My dream shot was way underexposed.

This was the best I could do in Rawshooter. By no means horrible, but certainly not a great picture. One subject underexposed, the other green and faded in the background.
P8240029-01sm.jpg


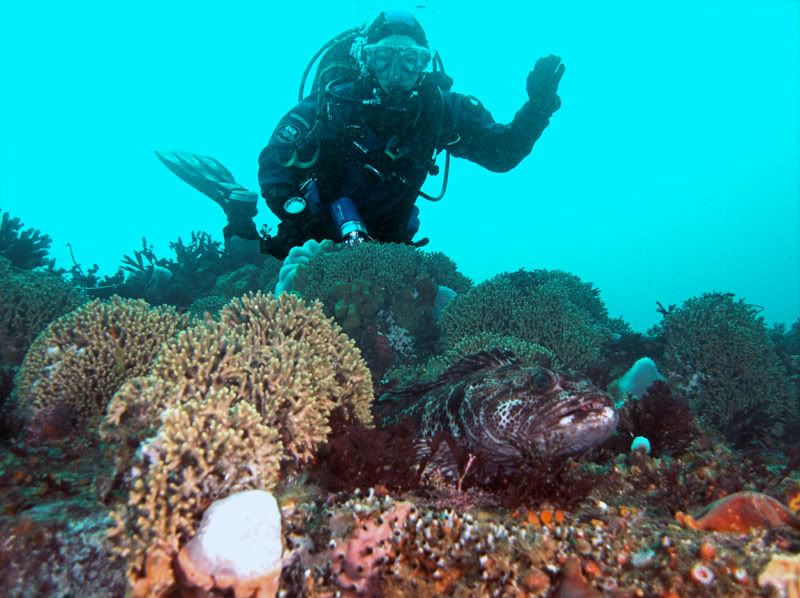
I thought about how to fix it, figuring I'd certainly play with it in PS7, but it would be difficult to get right. Here's what I came up with in Photoshop by isolating the diver and correcting the lighting separately.
P8240029-01pssm.jpg


My final thought was, OK I haven't played with Photomatrix yet since I downloaded it. What if I make several conversions with different lighting and white balance. I brightened up one as much as I could. I did one with normal settings and the fish too dark. Lastly, I did one with the white balance set in the background on the diver's gauge. The foreground was bright red. I combined the three in Photomatrix, then did some color adjustments in PS7 to get make it a little more "normal". This was what I came up with.
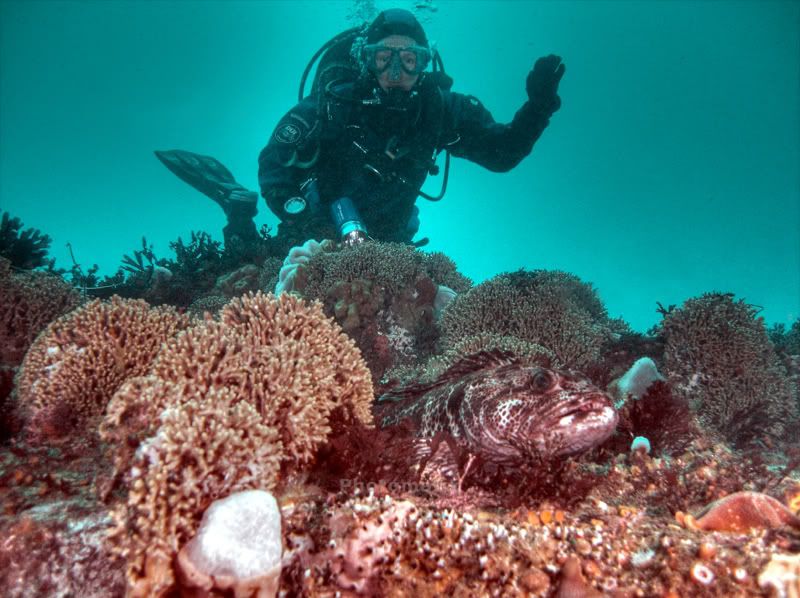
P8240029-01_2_3_4_tonemappedpssm.jpg


What do you think?
 
Larry: Very interesting result. HDRsoft does not suggest using Photomatix on "multiple exposures" created from the same image (their example is a RAW file developed at various exposure settings). Their theory is that the image is not true HDR since you cannot increase the dynamic range that way. Your shot says there is a use for their software they may not have considered.

This will be my next plug in purchase. How do you like it so far?

---Bob
 
I think the pure Photoshop version is nicer, but I would tone down the contrast a little and apply a little noise reduction. I would also try using the Shadows/Highlights tool, which is a Photoshop version of tonemapping.

Maybe it is me, but I really dislike the Photomatix halos and you are correct a lot of people confuse tonemapping with HDR. HDR can only be done with multiple exposures, not multiple processes of a single image. Otherwise all you are really doing is applying a curves adjustment.

I like the PS verision better, and I think there is more you could do with it in PS.
 
Larry: Very interesting result. HDRsoft does not suggest using Photomatix on "multiple exposures" created from the same image (their example is a RAW file developed at various exposure settings). Their theory is that the image is not true HDR since you cannot increase the dynamic range that way. Your shot says there is a use for their software they may not have considered.

This will be my next plug in purchase. How do you like it so far?

---Bob

This is the first time I've used it. I took some shots in Utila specifically for it, but haven't gotten around to messing with them yet. It seems pretty easy to use, and I know there are more tools on there for adjustments I haven't made. I went to PS to clean up the color. It was somewhat oversaturated, so I just hit autocolor. Then I went into levels and turned the red and the green down about 5% in the midrange.

Larry: There was a lot of recoverable information in your original image.

LarryPicProc.jpg


---Bob

That came out pretty nice Bob. I'd still like to contrast the diver a bit more, but you brought the foreground out nicely, and took the green out of the water. I'm still a hack at photoshop, plus eventually I'll turn in my PS7 for CS, which seems to have more features for UW use. What did you do?
 
Larry: I ran my updated color correction action set on the image. It runs 15 color correction routines and allows you to examine the results in the History Palette as snapshots. You then pick the best snapshot for further work.

The routine that worked the best was the Mandrake Method followed by the Match Color neutralize function. This was surprising to me because your image had good red channel information in the foreground.

Mandrake tends to wash out blues in the water so I used a mask for the diver and the foreground and blended it with a Hue/Saturation adjustment on the original background.

Flesh tones in the diver were enhanced by using the sponge tool set to desaturate.

I did run a noise reduction plug in and used a curves adjustment layer to increase contrast a little bit. You could drop the shadows a little more in curves if you want the diver to stand out more. This will plug some of the details in the shadow areas

PM me your email address and I will send you the psd if you want.

—Bob
 
Thanks Bob. I will PM you.
 
https://www.shearwater.com/products/peregrine/

Back
Top Bottom