Please register or login

Welcome to ScubaBoard, the world's largest scuba diving community. Registration is not required to read the forums, but we encourage you to join. Joining has its benefits and enables you to participate in the discussions.

Benefits of registering include

  • Ability to post and comment on topics and discussions.
  • A Free photo gallery to share your dive photos with the world.
  • You can make this box go away

Joining is quick and easy. Log in or Register now!

AKinnunen

Registered
Messages
35
Reaction score
76
Location
Beijing
# of dives
200 - 499
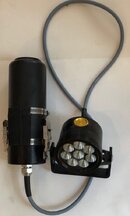
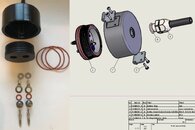
Here are some photos from my canister light project.
The design is ready and almost all of the parts have arrived. The final assembly will be completed within the next two weeks. My own pressure chamber (DIY) is ready at the end of April, then I can do pressure tests up to 150m. I have a batch of 3 light heads currently in fabrication, since the minimum order quantity was 10pcs or more for many of the components. This light head is possible to install to any battery bag given the voltage is between 5 to 15 volts and can supply 80w. I will also build my own designed battery bag later this year. I have been using my old one up until now.

The goal of the project is to make the “best of the best” canister light using best components and materials.


RD.JPG
parts.jpg
 
what's the beam angle and efficiency out the lens?


Hi, tbone1004.

Thanks for your question.

I have two different reflectors designed for 6 and 12 degree angles. I can also move the LED a little inside the reflector if needed to find other angles.

Personally I like a wide angle more, however I'm currently testing between 6 and 12 degrees to see if there is any real difference.

When the light is ready I will find a lab to test the real output for lumens. Cree XM-L2 gives 1198 lumens at 116 lumens-per-watt efficiency at 3A, 25°C. If staying inside the Cree specification, the theoretical max efficiency is 8x1198=9584 lumens. I can easily adjust my driver to get the missing lumens if needed. The design is made so that upgrading the LEDs to the next generation is super easy once they come to market.
 
The date is a public holiday in China so it's time to continue my project. I assembled all of the parts together and everything looks promising. I can’t use a piezo switch because one component's behavior on the driver board was different than expected. However, with the first test, I could use full power. (adjusted to 80W) My first impression was how incredibly bright these LED's are and also the rate of increase in temperature to the light's body. Looks that heat transfers from the LED's to the body as planned.

Dropping into the water testing:
First water test and there were no bubbles! The plan is to keep the light on for around 100 hours. After the first five hours, everything looked normal, so far so good. Underwater, the weight was 460gr, which was a little less than what I counted before? I also recorded power consumption, which looks very linear. That tells me that there are no changes in the LED driver during testing. Next step is fix LED driver and pressure test…

About the LED driver:
I designed my own Driver because I wanted to later upgrade the software and hardware, such as the LED's. I also tested several ready drivers, but either none were suitable, or the output was half or less than what their specification was. The LED driver has been designed so that there are two individual drivers. In case that some component goes broken at least half LED's will still work normally. This is just safety feature. here is my short specification for the LED driver:
  • Two individual drivers and two LED groups(2x4 LEDs)
  • Input voltage is 5-15V-
  • Theoretical efficiency is over 90%
  • Output is 2 x 13.2V, 3A (possible adjust up to 16V)
  • Off, 50%, and 100% power selection
  • Voltage control, power save mode (low voltage)
  • Shortcut protection (input and output)
  • Possibility to change / upgrade software
Here are some photos from progress:
L1.JPG

L2.JPG
L3.JPG
 
Thank you for your interest in my project.

The burning test is still ongoing. 25 hours done and everything is still normal. There is a small delay to the project because the PWB needs a little redesign.

Now is good time to focus on other tasks. Next, the “hat” to the battery bag.
Because I use my old battery bag, it gives some limit to design. However, the idea is that the hat and battery is fully sealed so the hat can be opened at any time under water or even change battery if needed.
The assembly went without any problems. I might need to make a small update so the cable change doesn't need any soldering in future. The light is now mechanically ready. The design doesn’t have major updates, just need to design some special tools to help assembly.

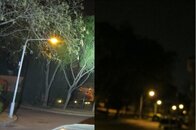
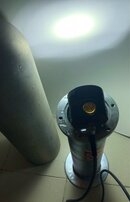
I measured the beam angle, it is somewhere 6 to 8 degrees, I also made my neighbors scare and illuminate the near park.. Wow... this is super...
hat2.jpg Hat assy.JPG park.JPG
 
Pressure test

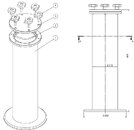
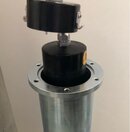
First notice: The pressure chamber design and fabrication process need special skills. Since I don't have much experience in pressure chamber design, same goes for the guy that does the welding. I’m worried that I find my tank from orbit.
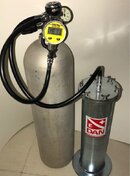
I made test pressure using my Mares 22 regulator what is easy to adjust up to 16bar (equal to 150m), which is my depth testing target. Of course, this is little high pressure for hoses and connectors, so it's better to be very careful.

Test:
Light head to chamber (I don’t want test my battery this time because some O-rings need swapping), - water to the tank – tight closing and… first 10bar: No leak. Then 16bar: still no leak. I kept things inside tank two hours- chamber opening and power to the light and it still works! Now I can say that design was successful. I also shortly tested over 18bars, which is the upper limit of my pressure gauge.

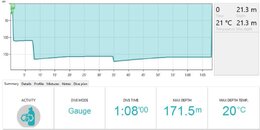
Next time, I will place my old Suunto D6 to test with the light (Gauge mode). It gives nice report from the test. Happy day!! Now I have own pressure chamber so I can test my lights and other gears in future!

Again, this isn’t a really safe DIY project.

I got a new set of components for the driver board this week When the new PCB is ready, I can got for a test dive and finish this project.
assy.JPG fill up.jpg set up.jpg test.jpg
 
Have to test little more my new toy…

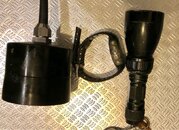
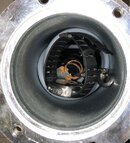
Now I put inside to the chamber my Suunto D6, Light head again and Chinese “no name” light

Every one works well after one hour / 100-170m dive. Next I test my Suunto EON, but I’m worry that Suunto’s program never forgive me and goes to permanent error mode.:)
858152579.jpg 1489638248.jpg test report.JPG
 
https://www.shearwater.com/products/perdix-ai/

Back
Top Bottom