3d Printing with an SLA Peopoly MOAI

Please register or login

Welcome to ScubaBoard, the world's largest scuba diving community. Registration is not required to read the forums, but we encourage you to join. Joining has its benefits and enables you to participate in the discussions.

Benefits of registering include

  • Ability to post and comment on topics and discussions.
  • A Free photo gallery to share your dive photos with the world.
  • You can make this box go away

Joining is quick and easy. Log in or Register now!

kelemvor

Big Fleshy Monster
ScubaBoard Supporter
Messages
7,661
Reaction score
4,708
Location
Largo, FL USA
# of dives
200 - 499
I was chatting in another thread about 3d printing scuba gear. I just ordered an SLA printer named the Peopoly MOAI to print scuba gear among other things. Didn't want to take that thread over so I started my own. I'm being kind of verbose because several folks had questions.

The printer came in a kit for $1,400 from matterhackers.com. I ordered another$400 in extra stuff like resin. Resin is the raw material an SLA printer uses.. basically a liquid plastic that's cured to hardness with exposure to UV. The printer uses a UV laser to draw the slices in a vat of resin, and the print bed raises out of the vat with your printed part attached.

I'm not new to 3d printers, but I'm new to SLA. it took me a good 8 hours and 11 test prints to get the printer aligned correctly. That involves leveling the vat to within .3mm of a target by manually twisting four nuts. Test print, rinse (literally), repeat. Now it should not have taken me that long. I had mislabeled the corners of the vat, so my first 7 attempts were totally wasted. Attempt was a little better but I had designed a spreadsheet to help me manage the data and accidentally inverted my adjustment output (I raised the bed instead of lowering it). After getting that sorted out it took me 3 more attempts to get all four corners in the tolerable range.

It should have only taken 3 attempts. The documentation is quite ambiguous on which corner is what. I wish they had come labeled - nearly everything else came labeled.
 
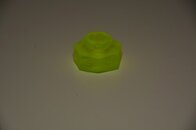
My first useful print was a simple thumb wheel for turning a nut on a 0.7mm pitch screw in .1mm increments. It came out perfect the second try. First try was spoiled because I didn't select the proper calibration when I sliced so the part came out a tad too small.

Moai Thumb Knob by Kelemvor

My next print(s) are a little more ambitious.

Since my prints will need to be UV cured, I'm building a UV light box: UV_LIGHT_BOX by 3D-IN

The box is bigger than the max dimensions the MOAI can do by 3cm on the x plane (z plane, too so rotation won't help). I split each part in half with Meshmixer, and will end up printing 12 parts to make the box. The printer estimates it will take around 13 hours for the first part. In my limited experience, that estimate is a little conservative. I bet it will take a good 15 or so.

I have not attempted to print any of my own designs yet. So far this printer has been super easy to use. Far far simpler to get succesful prints than the FDM ultimaker that I'm familliar with - albeit far far slower to print.

I've been using Asura3D to do things like add supports and drain holes. Asura3D launches Cura in the background to do the actual slicing. Asura is fairly flakey, crashes occasionally and is dead simple to use.
 
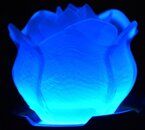
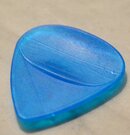
DSC_3172_small.jpg DSC_3180_small.jpg DSC_3178_small.jpg DSC_3176_small.jpg

These are some of my first prints (after the various test prints recommended by the manufacturer). So far, I'm thrilled with the quality!
 
Neat, what are you printing in and how does it compare from a durability / water / uv resistance to say PETG using more normal filament? Would love to hear more about durability of the various materials in a diving context but there doesn't seem to be much out there.
 
I haven't yet printed any useful items for scuba. When I get done creating the drone, I'll come up with something. However the first item I have in mind is parts for a light. The inside of the light will almost never see much UV exposure so it won't be a good test.

I've never used PETG in an FDM printer so I've got no frame of reference. I do have some scuba parts printed in PLA on an FDM printer that have been used 5 or 6 times on a boat with no noticeable degradation. Unfortunately, I didn't care for the thing (gopro mask strap mount) so it was retired.

I'll ask the resin manufacturer if the resins I'm using are similar to some particular type of plastic. Surely it must be.

Since the resins are UV cured, I'd have to guess that it will eventually break down with excessive UV exposure. Maybe not, I really don't know. I do know that to cure a part using the sun (in Florida) it took me two full days dawn-dusk. My UV curing lamp finally got delivered so I don't have to wait quite as long for curing.
 
I don't have a printer just yet, but plan on getting an ender 3 in a bit and try to build a bracket for an alien like light. (basically 3 Orcatorch 520s on a goodman handle) Will try PETG first but figure worst case if that doesn't prove to be strong / durable enough can just prototype using the printer then get it machined out of Delrin by a mail order firm. Fun what is possible these days.
 
I'll ask the resin manufacturer if the resins I'm using are similar to some particular type of plastic. Surely it must be.

Since the resins are UV cured, I'd have to guess that it will eventually break down with excessive UV exposure. Maybe not, I really don't know. I do know that to cure a part using the sun (in Florida) it took me two full days dawn-dusk. My UV curing lamp finally got delivered so I don't have to wait quite as long for curing.

The Moai hi-temp nex resin is a urethane acrylate and acrylic monomer mix. Urethane acrylates tends to have pretty good resistance against uv breakdown when used outdoors. I'd expect properties that look similar to parts cast out of rigid urethane.

The UV cure process involves a photoinitiator that reacts to certain uv wavelengths (likely not the ones that are found in sunlight in large amounts, explaining the long cure time you experienced). The cure process consumes the photoinitiators, so your long term UV resistance is more of a property of the bulk material than the additives for uv curing. There are some uv inhibiting clear coats that you could apply after printing to further reduce degradation from long term uv exposure.
 
I haven't yet printed any useful items for scuba. When I get done creating the drone, I'll come up with something. However the first item I have in mind is parts for a light. The inside of the light will almost never see much UV exposure so it won't be a good test.

I've never used PETG in an FDM printer so I've got no frame of reference. I do have some scuba parts printed in PLA on an FDM printer that have been used 5 or 6 times on a boat with no noticeable degradation. Unfortunately, I didn't care for the thing (gopro mask strap mount) so it was retired.

I'll ask the resin manufacturer if the resins I'm using are similar to some particular type of plastic. Surely it must be.

Since the resins are UV cured, I'd have to guess that it will eventually break down with excessive UV exposure. Maybe not, I really don't know. I do know that to cure a part using the sun (in Florida) it took me two full days dawn-dusk. My UV curing lamp finally got delivered so I don't have to wait quite as long for curing.

What type of resin are you using?
 
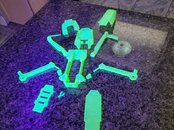
20190405_120639.jpg
The parts are done. I dropped one of the pieces and broke it. Then I discovered something great about resin printing. All I have to do to "glue" it is to brush some resin on and hit it with a UV light. Actually I used some "bondic" which is basically a uv resin that cures very quickly to hold it in place, then I filled everything in using resin and a paint brush and cured it in a uv light. You have to look closely to tell it was ever broken, and it seems strong.

What type of resin are you using?
Peopoply neon green: Peopoly Moai Model Resin - Neon Green (1L)

I used a little over 0.5l of resin on this set of prints. I used so much because most of the parts were printed 100% fill.

So.. I guess that's about $45 for the body of the drone. I scavenged the pdu, controller, motors etc from an old drone I had that I wasn't using.. and I bought a nice lipo battery pack for another $35. I imagine I'll have $100 or maybe $150 into the thing when I'm done. That's probably the cheapest mavic ever...err not really. you can get mavic clones for under $100 on amazon. This one at least has some nice autopilot features in the controller.
 
https://www.shearwater.com/products/peregrine/

Back
Top Bottom