Cylinder Clamp for 1/2" valve R&R, looking for ideas

Please register or login

Welcome to ScubaBoard, the world's largest scuba diving community. Registration is not required to read the forums, but we encourage you to join. Joining has its benefits and enables you to participate in the discussions.

Benefits of registering include

  • Ability to post and comment on topics and discussions.
  • A Free photo gallery to share your dive photos with the world.
  • You can make this box go away

Joining is quick and easy. Log in or Register now!

duckbill

Contributor
Messages
833
Reaction score
53
Location
CA
Short of buying a chain vice, what are some ways that a cylinder clamp can be made for holding cylinders secure for 1/2" valve removal/replacement?
 
If you have a regular vise use a loop of 3/16 chain and drap it over the tank and under the vice jaws. With the correct length loop as you close the vise it will tighten the chain
 
I built a cylinder holder for cylinders all the up to HC-4500s to facilitate the removal of valves.

I started with a 4x4 piece of wood about 5 feet long. I drilled two large holes in it, spaced just wider than my largest cylinder.

Then I bought a thick threaded rod. I bent it into a U shape and pushed the ends through the holes in the 4x4. Then attached large washers and nuts.

You put the cylinder into the U shaped threaded rod and turn the nuts until it's tight around the cylinder. I use a piece of carpet for padding between the threaded rod and the cylinder. Tighten only enough to keep the cylinder from spinning, no more.

Here's a photo of something similar found on this web site. I built mine a bit differently. I put the threaded rod in the middle of the board and put 6-inch high stands on both ends so that I can tighten the nuts without lifting up the whole contraption.

jig_bottom.jpg
 
Thanks for the ideas.
I just got back from Home Depot with some supplies:D
I think the ideas you guys gave me will make for a much simpler clamp than I originally envisioned. I'll let you know how it works out.
 
BTW, you need a torque wrench and crows feet wrenches to get the valve back on torqued to specifications.

Some may poo-poo this suggestion, but if you want to DIY correctly....

10%20pcs.%20Crow%20Foot%20Wrench.jpg

Crow Feet Wrenches
 
Never in my years of doing regulator and valve work have I used a torque wrench or seen the need to. I do use torque wrenches of which I have several but not on diving equipment. Plus there is no torque spec for the 1/2" NPT valve duckbill is working on. Ever see a plumber use a torque wrench.
 
The NGT taper valves are NOT tightened to a torque spec, but to a tun from hand tight spec.

The general procedure is to:
1. Clean both the tank threads and the valve threads of all old sealant compounds
2. Turn the valve into the tank as far as you can without using a wrench and mark both the valve and the tank to identify your "0" point.
3.Remove the valve counting turns and record the turn count for future reference.
4. Apply the appropriate Teflon tape or other sealant to the valve threads. If using tape use between 1.5 and 2 wraps of tape, more is not better here. Too much tape causes the valve threads to fail in shear.:shocked:
5. Reinstall the valve to the "0" point counting the turns as you go in. A wrench WILL be required this time.
6. Tighten the valve 1.5 turns past this "0" point. A BIG wrench, or wrench and pipe extension will be required here.

If the valve leaks at the base threads after doing this, replace the valve. It's threads are out of spec.
 
Thankyou all for the helpful suggestions and tips.

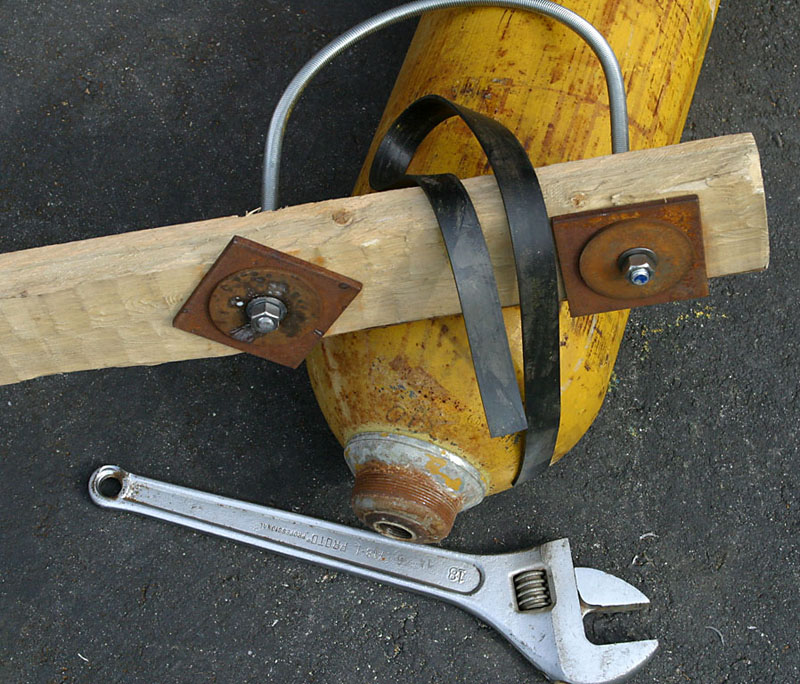
I'll post pictures of what I did, so someone else can use it as a basis to be improved upon. Basically a 2X4, 2 bolts, 3 washers and nuts, and a steel strap is all it took. I bent the end of the strap over on itself to make the reinforcement for the loose end. It cost less than $9, which is 1/10th the sale price on the chain vice I was considering purchasing. With my finances being what they are, necessity is the mother of invention.

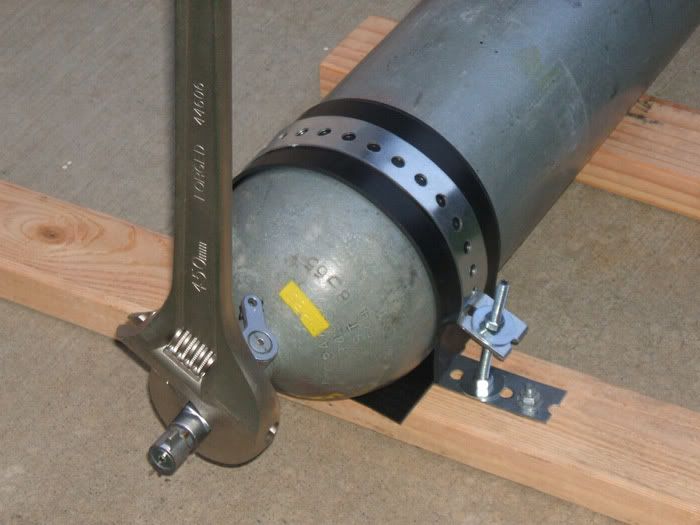
Thanks also for the tips on valve R&R. I only use 1 1/4 turns of tape, and tighten with an 18" crescent wrench until as tight as I can without feeling I may cause damage. It probably isn't 1 1/2 turns past the untaped position, but it is tight and doesn't leak. I understand that each time these 1/2" valves are tightened that the valve will seat lower due to thread extrusion and that these valves consequently have a certain useful lifespan. But, since there are only nine to ten threads on the average valve, and say half or more of the threads are turned in hand tight, that only leaves less than five threads for torque. If one tightens the valve 1 1/2 turns more than the untaped position at each tightening, that would only allow for the valve to be used for three or four torquings (three or four years worth of annual visuals). I know many of these valves have been R&R'ed more than twenty times and are still going strong. Anyway, it's all together and the threads are fully loaded, not loose, not too much tape was used, and it doesn't leak. I'm sure she's fine.
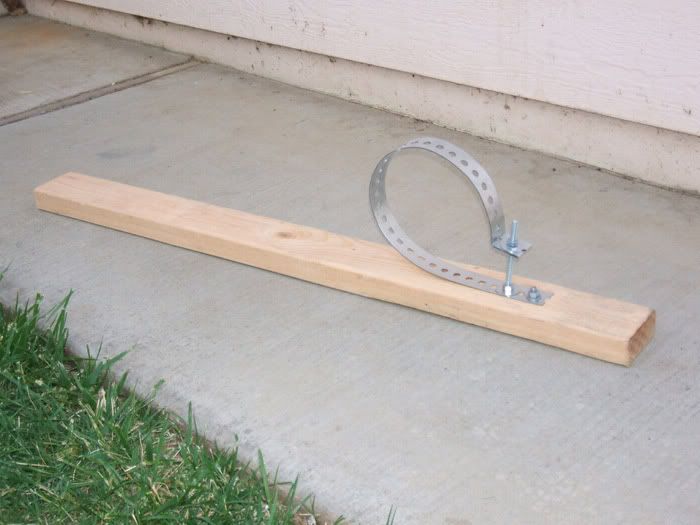
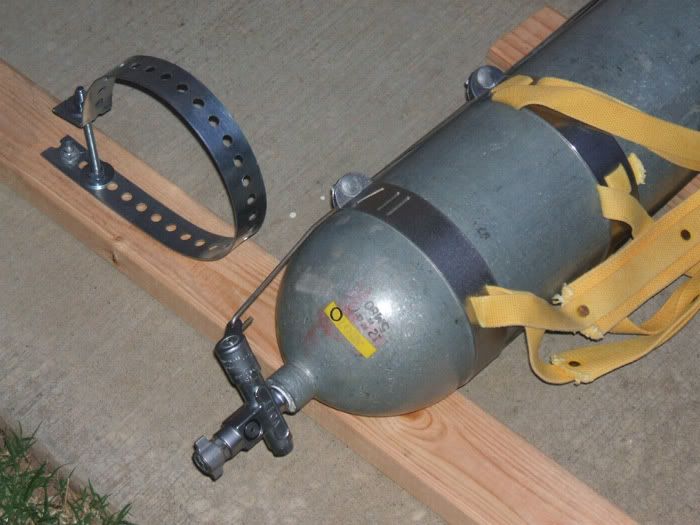

The whole fixture.
DSCF3333resized.jpg


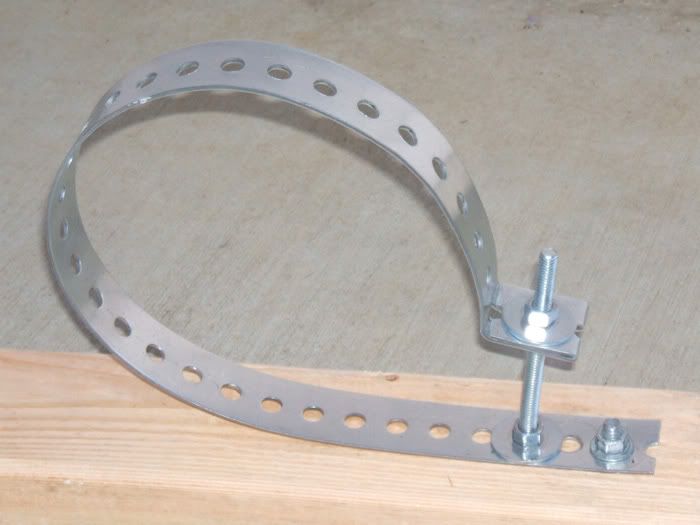
Details of the clamp.
DSCF3334resized.jpg


Cylinder ready for servicing.
DSCF3335resized.jpg


Insides look good, no red flags, back together, and ready to dive.
DSCF3336resized.jpg


The cylinder is reversed in the fixture for tightening since the downward force should be on the long leg of the 2X4, and the bolt should be under tension while torquing the valve. Notice I left enough 2X4 on the short end to step on while turning the wrench.
 
Last edited:

Back
Top Bottom