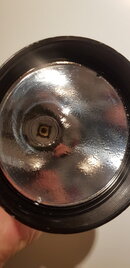
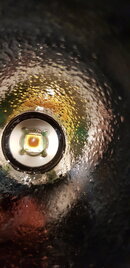
I found no disassembly guide for this lamp, so here is one.
My MJ876 lamp stopped reacting at some light levels.
I could make it react using an external magnet, and using the external magnet actually made it Work for a while.
Theory: the magnet is for some reason weakened. Change the magnet.
So here is a disassembly guide:
To remove the battery:
1) Get a 15mm nut. Drill a bit into the threading using a 10mm drill. This Tool will open the battery compartement:
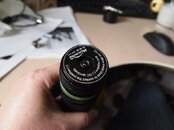
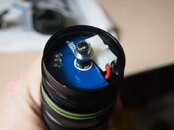
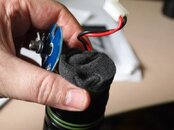
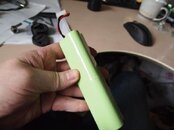
So you can see the nice 6*18650 pack, and if you hoped that the charging connector was Water-tight, it isn't.
To get to the switching ring, you don't need to dismount the battery.
To remove the front:
You can't simply unscrew the lamp at the battery indicator. You need to remove the reflector first:
Remove the glass holder ring:
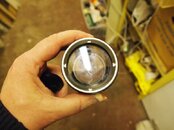
You need to make a Tool to unscrew this. I did like this, and it worked fine:
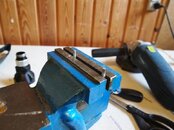
After removing the glass, you see the glass o-ring.
You are now at the reflector. unscrew it to get it out.
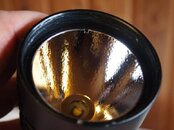
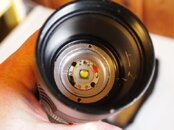
You can now un-screw the front part of the lamp, threading is in front of the battery indicator.
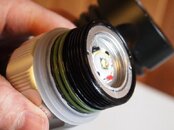
Notice the two green O-rings.
Remove the two green O-rings, and you can slide forward the battery indicator ring:
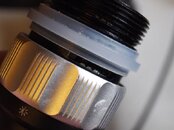
Then remove the switch ring, beware of the spring/ball:
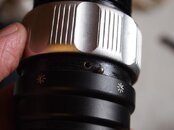
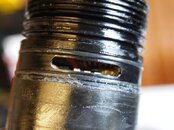
Notice that the LED window is only single or-ring secured - I guess it is OK, as the Water will compress the plastic opposed to the alu. But it needs to be clean!
Now, the magnet is visible. It is a round disc, 5mm diameter and around 1mm thick.
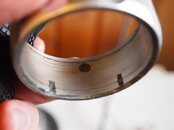
It is very visible why it is weak. It is corroded away. This could also explain why some people complain about sand under the ring. The "sand" could be disintegrated magnet.
Disassembling the Electronics:
I didn't disassemble the Electronics this time, to avoid messing with the heat sink paste under the LED. But it is straight-forward, unscrewing the two-hole ring around the LED.
The magnet is easy to pick out and replace. I'll be back when I've got a replacement.
I also have a Magicshine MJ-810e.
The ring is stuck on that one.
I disassembled it - that is very simple, "just" unscrew it behind the magnet ring.
(Writing "just", as I suspect the threading is slightly glued, it needed quite a bit of power)
The Square 4x7x1mm magnet was everywhere.
In general the lamps look fully like western stuff inside, especially the big MJ-87x's. This both applies to mechanical and Electronics/PCB/SMT mounting quality.
But the corrosion protection of the magnets seem to be the weak spot. Rinse the ring well!
My MJ876 lamp stopped reacting at some light levels.
I could make it react using an external magnet, and using the external magnet actually made it Work for a while.
Theory: the magnet is for some reason weakened. Change the magnet.
So here is a disassembly guide:
To remove the battery:
1) Get a 15mm nut. Drill a bit into the threading using a 10mm drill. This Tool will open the battery compartement:


So you can see the nice 6*18650 pack, and if you hoped that the charging connector was Water-tight, it isn't.
To get to the switching ring, you don't need to dismount the battery.
To remove the front:
You can't simply unscrew the lamp at the battery indicator. You need to remove the reflector first:
Remove the glass holder ring:

You need to make a Tool to unscrew this. I did like this, and it worked fine:

After removing the glass, you see the glass o-ring.
You are now at the reflector. unscrew it to get it out.


You can now un-screw the front part of the lamp, threading is in front of the battery indicator.

Notice the two green O-rings.
Remove the two green O-rings, and you can slide forward the battery indicator ring:

Then remove the switch ring, beware of the spring/ball:


Notice that the LED window is only single or-ring secured - I guess it is OK, as the Water will compress the plastic opposed to the alu. But it needs to be clean!
Now, the magnet is visible. It is a round disc, 5mm diameter and around 1mm thick.

It is very visible why it is weak. It is corroded away. This could also explain why some people complain about sand under the ring. The "sand" could be disintegrated magnet.
Disassembling the Electronics:
I didn't disassemble the Electronics this time, to avoid messing with the heat sink paste under the LED. But it is straight-forward, unscrewing the two-hole ring around the LED.
The magnet is easy to pick out and replace. I'll be back when I've got a replacement.
I also have a Magicshine MJ-810e.
The ring is stuck on that one.
I disassembled it - that is very simple, "just" unscrew it behind the magnet ring.
(Writing "just", as I suspect the threading is slightly glued, it needed quite a bit of power)
The Square 4x7x1mm magnet was everywhere.
In general the lamps look fully like western stuff inside, especially the big MJ-87x's. This both applies to mechanical and Electronics/PCB/SMT mounting quality.
But the corrosion protection of the magnets seem to be the weak spot. Rinse the ring well!
Last edited:


