


Leisure Pro Brett
Contributor
Over the last couple of years my drysuit has been leaking on my shoulders every so often when I was diving, I found that if I moved the right way I wouldnt get any leaking at all, but if I moved the wrong way the water would come in quite fast. So it was time to replace the zipper and after 10 years of warm diving that didnt seem like too much of a problem until I saw how much it would cost to have it done. The logical next step was to try to do it myself, unfortunately my NYC apartment probably isnt the most ideal work area but its what I have to deal with. Needless to say this is just my experience with replacing a zipper and by no means the definitive guide for doing such, you should only undertake this procedure if you are comfortable doing so at your own (and your suits) risk. Much of the info I got for doing this swap came from this thread by Dave4868 as well as my own experiences changing wrist and neck seals as well as fixing the occasional leak. For the parts needed to do this swap the hardest part to get was the zipper but after a bit of work I got that taken care of. The local Home Depot covered most of the rest, the Weldwood contact cement, roller, paint brushes, and a small plastic dropcloth. The monster tube of Aqua seal came from Leisure Pro and I already had the razor used to cut the stitching that held the zipper in and the Dremel used to grind off glue and prep the surfaces.


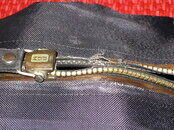
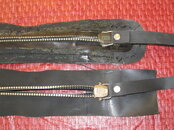
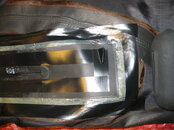
- The first step is to get all your tools together and your workspace prepared, keep in mind you will be using 2 types of glue as well as sanding and trying to keep a fairly bulky suit in place. The process also takes a bit of time so make sure you have a fair chunk of time set aside. Here you can see some of the wear on my zipper that was causing the problem, there was another space on the zipper that was almost as bad.
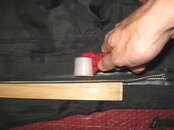
- Next we remove the heat tape and the zipper, you can use a hairdryer or a heat gun to help loosen things up a bit. I dont have a heat gun anymore so the hairdryer was my chosen tool. If you use a hair dryer the process will take longer but you dont have to worry as much about melting/burning the suit and your fingers.
- Once its warmed up pull off the heat tape, this step was fairly easy on my suit.
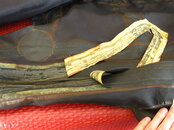
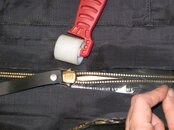
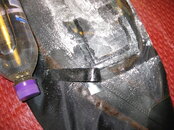
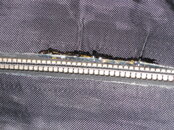
- Now for the hard part, getting the zipper out, this was probably the most labor-intensive part of the process. Not only is the zipper glued into place quite well, it is also stitched in which slows down removal even more. Basically you heat up a about a foot of suit and then pull the zipper away from the suit at a corner to get started. Then while separating suit from zipper you cut the stitching and slowly but surely you work your way around the suit. If you are using a razor blade be sure you dont cut the suit accidentally.
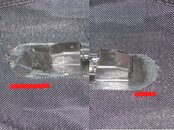
- When its out you can set the old ugly one next to the nice new one.
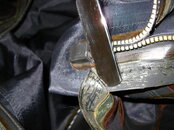
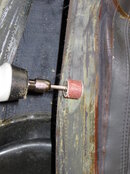
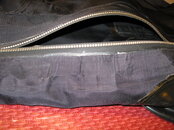
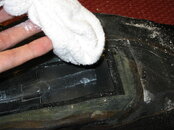
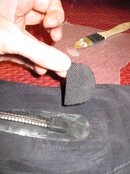
- In the next step you need to remove any excess glue left on the suit. You dont have to grind it all down but you do want to get off as much as you can. This serves 2 purposes, the first is it smoothes out the area to be glued, the second is that it opens up the glue and material to better accept the glue you will be putting on. If you had a suit where they used Aquaseal to seal the zipper there will probably be a fairly large rim of that to grind down. You can see the top of the pic has been ground down a bit, the bottom is next.
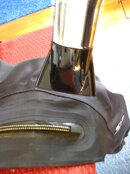
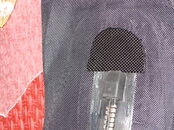
- The next part involves getting the suit ready to be glued and have the new zipper put in. Since my suit was a shoulder entry it helped to take the dump valve out so that the arm would lay flat and make the job of installing the zipper easier. I also took this time to quickly roughen up the part of the zipper being glued with the grinder. Remember you want this glue to stick and hold the zipper in for a good long time.
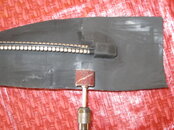
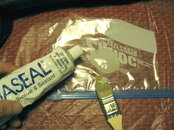
- Use some weights to hold the suit in place so that we can apply the glue pretty much per the instructions on the can. Mix it up really good then apply 3 coats to both the zipper and the suit where the zipper will be sitting. If it helps you can do a test fit and mark off the areas on the suit that will need the glue with some chalk. You want to move fast on this part so once you have a coat on the suit and the zipper its time to go back and put the second coat on the suit... and so on.
- This next step came straight from Dave4868s thread, put slices of heavy duty 1 gal Ziplock freezer bags over the contact cement on the zipper once its dried a bit so its only slightly tacky. This will keep the zipper from sticking to the suit unless you have already pulled back the plastic to expose the glue. Remember this stuff likes to stick and once the surfaces touch each other there isnt too much repositioning them so be careful.
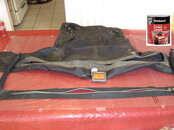
- Now you will quickly turn the suit right side out and place the zipper and a small hard/flat surface (scrap piece of wood) inside the suit for a hard surface to run the roller over. Line everything up and peel away the plastic from the zipper on the end you want to start with and gently push the surfaces of the zipper and suit together. Then you will work your way down the zipper trying to keep everything neat and lined up, be careful not to stretch the material at all when doing this. There is little give with a trilam suit but if you stretch a little each time you will end up with some excess that will only cause problems when you are trying to line everything up.
Attachments
-
 01.JPG152.5 KB · Views: 3,270
 -
 02.JPG82.1 KB · Views: 2,424
 -
 03.JPG100.7 KB · Views: 2,287
 -
 04.JPG104.3 KB · Views: 2,233
 -
 05.JPG120.5 KB · Views: 2,170
 -
 06.JPG117.1 KB · Views: 2,148
 -
 07.JPG122.5 KB · Views: 2,110
 -
 08.JPG111.7 KB · Views: 2,117
 -
 09.JPG100.4 KB · Views: 2,161
 -
 10.JPG112.2 KB · Views: 2,103
 -
 11.JPG113.1 KB · Views: 2,470

")
