Not UW photo, but PaintShopPro question

Please register or login

Welcome to ScubaBoard, the world's largest scuba diving community. Registration is not required to read the forums, but we encourage you to join. Joining has its benefits and enables you to participate in the discussions.

Benefits of registering include

  • Ability to post and comment on topics and discussions.
  • A Free photo gallery to share your dive photos with the world.
  • You can make this box go away

Joining is quick and easy. Log in or Register now!

Scubaroo

Contributor
Messages
4,360
Reaction score
23
Location
Cape Coral, Florida
Help!

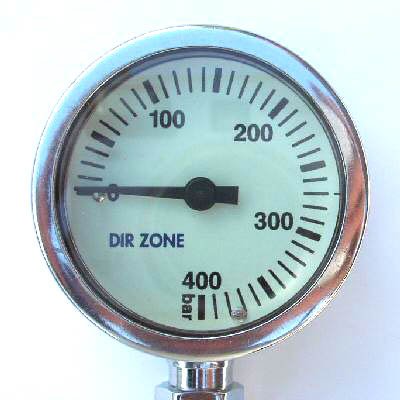
I have a bunch of product images for my scuba website, and I'm trying to convert them to a plain white background. Any ideas on how to do this? I've tried using Magic Wand with mixed results, but am unhappy with the outcome. I've got pretty crud lighting which isn't helping the inital image quality, but for 640 x 480 size shots, I'm not too worried about having magazine quality shots - just something tidier than having shadows etc in the images around products.

If you look on this page http://www.scubaroo.com.au/catalog/index.php?cPath=57, you can see a photo (supplied by manufacturer) at the top with a plain white background - that's what I'm trying to achieve with the other images on the page. I have a Canon G6, so if there's stuff I can play around with like white balance at the time of capture, I'd be interested to hear. I also have a couple of HID lights to help with lighting if anyone thinks that would help!!!

cheers
 
Photo's of small objects can be a challange to take, as it is hard to get even illumination of the object. In your case you also want to avoid shadows, which'll make this even harder. The big trick is to take the photo properly - the fewer shadows and the more even the lighting, the easier it'll be to select and remove the background. Firstly, turn off the on-camera flash, and ideally mount the camera on a tripod. Next, you need to illuminate the object as evenly as possible. There are several ways to do this. The easiest is to put a few lights around the room, aimed at the roof. To get as white a background as possible put the object on heavy white paper.

Professionals will use a light box to make as diffuse and even lighting as possible. These consist of a round chmaber made of thin white cloth. The cloth acts to diffuse the light, and if illuminated properly will prevent the formation of any shadows.

I've made a simple shade out of a 4L milk jug. Cut off the bottom, and enlarge the hole in the top enough so the lens barely fits through. Obviously, this'll only work for smaller objects, but it works. Something I've found that works very well is an old, white, lamp shade. Just use wirecutters to remove the wires from the middel and you have a mid-sized light box.

Bryan
 
I agree with Warthaug, having the best, shadow free images to start with will be easiest. I took your SPG400 image and played around with it for a couple minutes, results are attached. I don't use PSP, I have Photoshop, but the tools should be similar.

What I basically did is set my foreground color to white, and use the paint bucket tool to paint the background out in two quick steps. This should work pretty well for images where the edges of the object are clearly some other color, if part of the edge of the object is the same color as the background color, it will be overpainted as well. So ymmv. The first image is an example of what still had to be manually fixed after doing this operation.

I then cleaned up some of the image in the bigger picture. It still needs a little more work, I'm just using it as an example. It's harder to fix all the fine areas but the reflections off the chrome make the edge look rougher than it really is.

The way I did this was to use a white solid paintbrush with a 5 pixel size to overpaint the shadow out. Do this by selecting the brush size and color then zoom up the image to about 1200%, this will enable you to see the individual pixels. You can actually change the color of each individual pixel using a 1 pixel brush if necessary, but it's a lot more work. Using a 3-9 pixel brush you'll mostly get the same results, just don't paint too far into the edge of the object.

And I just noticed that I overdid the lower left area around the stem, notice the slight blurring there. I was playing around with a slightly blurred brush and went too far into the chrome edge there.

Using the magic wand only works when there is a clearly defined separation of colors between your object and the background. One thing I've noticed is that at times, it seems to work better if the background is significantly darker than the object, it seems that the wand has an easier time seeing the difference. So maybe try shooting on a black background and then changing the background to pure white in PSP. Although you'll need a clearly defined edge or any black shadows will also change.

Notice when this image is shrunk back to a thumbnail, some of the roughness is obscured. The third image is just a 1/2 size version of the second one, no further processing was done.

I think there's also a way to select and change the background color but I don't remember how to do it. You could do this with layer substitution and masking. Basically you'd create a new background layer, set it to white and then recombine the image into it. I'd need to know how PSP works to see if it's possible.

So maybe this will work for you,

Steve
 
I agree that it is best to try to get the light right rather than trying to fix it after the fact. That being said, sometimes you have no choice. Here is another approach that you might consider.

Does PSP allow masking? My copy of PSP doesn't but it is so old that would assume that the newer version do. In Photoshop you could mask the object and drop it on a white background.

Looking at the photos you have however, it looks as if you could get to about 90% of where you want to be just by tweeking up the brightness and constrast. There are still some shadows but is isn't terrible.

I also used a bezier tool ( the lasso thingy) to outline the object. Then I reversed the selection (to select the background and exclude the object) and boosted the brightness till all the shadows disappeared. (The bezier is a bit rough but not terrible.)

Here is your original:
spg_400_52mm.jpg


Here is the image with only an adjustment to brightness and contrast. Still some shadows but better:
bc.jpg


The image after using a bezier tool to adjust the background:
bc2.jpg
 
RickSp:
I agree that it is best to try to get the light right rather than trying to fix it after the fact. That being said, sometimes you have no choice. Here is another approach that you might consider.

Does PSP allow masking?

Any version after 6.0 does (I think). Versions 8 & 9 most definatly allow for masking, and should do just fine with the images here.

Good masking tutorial for PSP:
http://www.grafx-design.com/16psp.html

Bryan
 
Ben:

I don't use Paintshop Pro, but in Photoshop there is a tool called the pen tool that draws very fine paths. Your images are perfect candidates for a pen tool knockout. Problem is that the tool, although very accurate, has a learning curve.

---Bob
 

Back
Top Bottom