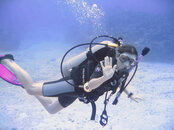
The Cayman Diver Advance Color Correction Tutorial

Please register or login

Welcome to ScubaBoard, the world's largest scuba diving community. Registration is not required to read the forums, but we encourage you to join. Joining has its benefits and enables you to participate in the discussions.

Benefits of registering include

  • Ability to post and comment on topics and discussions.
  • A Free photo gallery to share your dive photos with the world.
  • You can make this box go away

Joining is quick and easy. Log in or Register now!

I've been "playing" with your mandrake action with some great results. I thought I'd post one to illustrate:
bad_turtle.jpg

good_turtle.jpg

good_turtle2.jpg

1 Original
2 Mandrake
3 Auto Level
 
Hi Chuck. Thanks for posting. The basic Mandrake I use does not perform an autolevels at the end like the popular version available at the Adobe studio. What adjustments did you make, if any, after the basic Mandrake?

---Bob
 
Bob,
None, I've now added an auto level to above.
Chuck
 
cfelliot I really like your turtle photo. Here's a slightly different approach to how you might work this image.

3 steps.
  1. Levels; adjust overall color balance of entire image, represented by turtle on left.
  2. Curves; added slight contrast curve, not shown below, but you can see an overall punchiness added to the reef on the right. Notice that the color balance of the reef did not change, that is because I used Luminosity as the blend mode on the curve. Applying any curve in normal will affect your color balance, but Luminosity will not.
  3. Hue Satch Bright - Reds and Yellows; enhance color and detail of turtles shell, represented by turtle on right. This is where it gets interesting. Notice that after color balancing the entire image with Levels, the Hue Satch move of reds and yellows only affected the turtles shell. This is because Hue Satch is not really an Overal Image Color tool. In actuality hue satch is a Selective Color tool. Selective color tools are meant to work on Saturated Colors, in order to clean up and "purify" saturated colors.

bad_turtle1_3.jpg
 
Here's my try.

The problem with this image/file is not only that it has very little information in the red channel, but it is also that the blue channel is blown out (except on the diver). So 2 out of the 3 channels are damaged.

72935d1267583106-cayman-diver-advance-color-correction-tutorial-caymandiver1_copy-color-corrected.jpg
 

Attachments

  • CaymanDiver1_copy color corrected.jpg
    CaymanDiver1_copy color corrected.jpg
    341.8 KB · Views: 316
Last edited:
I did a quick work through and posted the following result.

LABtoRGB.jpg


I was asked for my steps and offered to post a tutorial.
I couldn't resist myself, this is the edit I managed in L*ab colorspace and some color manipulation.

 
https://www.shearwater.com/products/peregrine/

Back
Top Bottom