Innovative Dive Bag Redux

Please register or login

Welcome to ScubaBoard, the world's largest scuba diving community. Registration is not required to read the forums, but we encourage you to join. Joining has its benefits and enables you to participate in the discussions.

Benefits of registering include

  • Ability to post and comment on topics and discussions.
  • A Free photo gallery to share your dive photos with the world.
  • You can make this box go away

Joining is quick and easy. Log in or Register now!

fj, I like your idea very much. In fact, returning from my last trip from Coz I had a similar thought. I inserted my BP/W into my rucksack and the same light came on. As I did not want to cut up my carry on, I used the shoulder straps that came with it-but thought it would be a cool idea just to have my BP straps coming through the back and for an extra heavy load possibly the waist straps too.

For those of us who would prefer not to do too much sewing, etc. why not just cut the old shoulder straps off an existing rucksack and cut slots for the BP straps?

Press on with your project, I'm looking forward to seeing the finished project.

Couv, I think you could actually do that, though I think it would require at least some minor sewing. You could just sew the extra "flap" into the existing back of the pack and sew zippers down the sides and bottom edge of the pack back panel. It would look like a hack unless you do what I'm doing (disassembling the original bag first) but it would be completely functional. See the drawing in post 2 above for what I mean if that's not clear. If that doesn't make it obvious, I'll try to discuss that option more when I get to the steps where the back panel goes onto the pack.

Edit: IF you have shoulder straps that are adjustable, then they are usually able to be "unthreaded" from the waist belt. As such you wouldn't even need to remove the original straps. Just unthread them when you're using your plate and tuck them in between the plate and the pack.
 
Last edited:
And now for the next couple of steps in the process:

11) Side panel options: Side panels provide several different options for pockets, access zippers, and gear loops/straps. I chose to do one side panel with two "stacked" pockets, a short one layered on a taller one, and one side panel with two gear cinch straps. Option 11a will discuss pockets. Option 11B will discuss gear straps.

11a) Pockets provide several options in and of themselves. I have open-ended "drink bottle" pockets that lay flat against the sides of my bag. I layered mine. Other options are closed pockets, "loose" drink pockets and of course different size pockets as well as the option of "hidden pockets" that are nestled invisibly inside other obvious pockets.

i) Hidden pockets:
To do this just cut two pocket panels of the same size. Fold and sew the top edge ofeach panel (wrong side together) at 3/8 inch. Sew 1" velcro to the wrong side top edge of each panel. Sew the remaining three edges together at 3/8 inch. Sew the remaining pocket as you would a "standard pocket and you now have two pockets in one. These are great for small items like keys, credit cards, and similar items.

ii) Closable pockets:
Like hidden pockets, these can be made as fully independent pockets that are then sewn in to the bag or they can be sewn integrated with one side of the pocket being the side of the bag. If integrated into the bag, just replace the closure (velcro or zippers as you prefer) on the second pocket panel by putting them directly on the bag side panel where you want the pocket.

iii) Once you've got your pockets ready, pin them wrong side facing the right side of the side panel. Sew 3/8 inch at side panel edges, as appropriate. (IE a drink pocket at the bottom of the bag could be sewn at bottom and both side edges. A pocket at the center of the bag might be sewn at only the front and back edges of the side panels, or all four edges as appropriate.)


11b) Gear straps, as with pockets, provide several options. Clipping straps, cinch straps, daisy chain style straps, and many other options. For my example bag, I chose cinch straps. Whatever your choice, they're all basically sewn in the same way.

Get the straps sewn in at the front and back edges of the side panel at the desired location. Be sure not to interfere with any pockets when deciding placement. For cinch straps, put the cinch d-ring on a short section of webbing and sew onto the right side of pocket panel edge with the d-ring toward the center of the pocket panel. Sew the "loose" end of the cinch strap to the opposite (front or back) edge of the side panel in line with the d-ring. For clipping straps, sew the webbing onto the right side of the side panel at front and back edges in the desired location. If the clip buckle only allows for one
sliding buckle part and one fixed part, treat the fixed buckle part just like the d- ring in the cinch strap.

Use 3/8 inch seam allowance for all straps and sew using double or triple bar stitches.


12) Once gear straps/pockets are fixed on the side panels, pin side panels, rounded edge (at top) to front panel of the bag, right sides together. Front edge of pocket should align with "free" edge of the zipper and zipper cover panel sewn in step 3 above.

13) Fold the bottom panel side edge up to meet side panel bottom edge, right sides together and pin. Sew at 3/8 inch.

(you should now have a 3-sided bag with a bottom and no back)


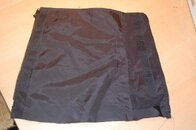
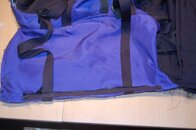
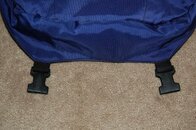
The following pictures were taken after competing step 13. In both pictures, the back panel edge of the side panel (unsewn) is at the bottom of the image.

Step 11 with layered pockets:
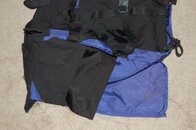
DSC_0016.jpg

Step 11 with fixed d-rings of cinch straps:
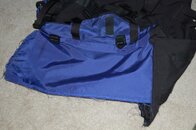
DSC_0017.jpg
 
You could cut 4 pieces of metal to fit the sides of the plate with holes drilled to match the holes on the plate, then bolt them together with whatever you want to use as the backpack sandwiched in between.

While trying to figure out what steps I've written already, I reread your post, richkeller. I think this idea actually has a lot of merit.

Instead of making metal plates that bolt on, you could make a soft-sided pack exactly like I'm discussing and save weight. You'd have a bottom and 3 sides and you could use a simple draw-string closure at the top if you didn't want to deal with a "fancy" closure option. I think the original thread I linked in the first post had a "bolt-on" concept but it was a full bag with flaps similar to my design.

The issue I see (and mentioned in the other thread) is that a bolt-on design requires more tools and pieces that could be lost while traveling, which then means the bag doesn't work as designed.
 
14) Sew side and bottom edges of back panel flap at 3/8 inch.
backflapvelcro.jpg
Note, this is both step 14 and 15aii,below. (I only used one pocket panel and the existing back panel as the other side of the pocket.)

The back flap is another good location for a "hidden" pocket. This can be accessible while the panel is zipped or made such that the panel must be unzipped to access the pocket(s). I chose to make mine accessible while zipped.

15) Hidden back pocket option can be sewn as a single side pocket, or with pockets on each side. Either option can provide full length pocket(s) or half-length pockets. See 15a for pockets on both sides or 15b for pocket(s) on only one side.
15a) Hidden pockets on both sides:
i) Fold edges of hidden back pocket panel(s) 1/2 inch wrong sides together. Sew at 3/8 inch.
ii) Sew wrong side of 1 inch velcro along right side of long edges of hidden back pocket panel. (x2)
iii) Sew zippers to wrong side of long edges of 1 hidden back pocket panel.
iv) Put velcro together and sew right sides of pocket panels together along 2 remaining edges.
v) Sew dividers for pockets as desired. (Lengthwise for two full length pockets and horizontally for shorter pockets or a combination thereof.)
vi) Sew pocket across top and bottom edge to wrong side of back flap.

15b) Hidden pocket on one side:
i) Sew velcro to right sides of long edges.
ii) Sew zipper to wrong side of one long edge of hidden back pocket panel, behind velcro.
iii) Fold hidden back pocket panel in half length wise, right sides together.
iv) Sew remaining two edges at 3/8 inch.
v) For two pockets, sew across short side at desired pocket lengths.
vi) Sew pocket across top and bottom edges and folded edge to wrong side of back flap.

16) Sew back flap to back panel at top, between shoulder strap cutouts, wrong sides together.
17) Sew zipper to right side of side panel along back edge with zipper facing toward center of side panel. (x2)


The following pictures represent the steps for 15 and 17.

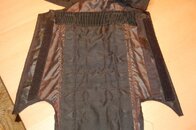
Back pocket panel with velcro and zippers (15a i-iii).
backpocket.jpg

Back flap panel with velcro (15a ii if not using 2 pocket panels)
backflapvelcro.jpg

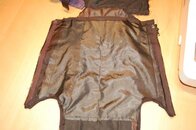
Back panel pocket sewn in and showing "hidden" opening. (15a iv-vi and 16)
backflappocket.jpgbackflappocketopen.jpg

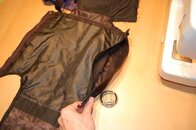
Zipper sewn into side panel. (Step 17)
sidecinchzip.jpg
 
18) Sew Clip buckle(s) to right side of one top flap panel along long edge, with buckles toward center of panel.

19) Sew top flap panels together at 3 edges, right sides together, capturing buckles between to panels.
topflapbuckles.jpg


20) Flip top panel right side out and sew unfinished edge to back flap at top, right sides together.
21) Sew clip buckles to front panel to mate with top flap clip buckles.

front-topflapbuckles.jpg
22) Sew zipper to bottom panel right side (with teeth toward center of panel) at back seam to mate with back flap bottom zipper.

NOTE: IF you want to use the bottom flap cover and extend the back flap to the front of the bag, this step should be done as a step between steps 7 and 8. Because I already had a front panel partially assembled, I added the zipper as a last step and it isn't sewn into the seam.


23) Sew back panel to side panels and bottom panel, right sides together.
24) Sew zipper to back flap bottom edge. (This will mate to back flap zipper as shown below.)
flapfrontzipper.jpg


25) Sew seam tape around all exposed seams.

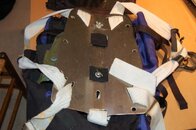
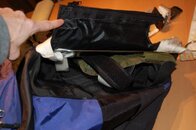
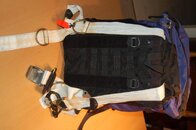
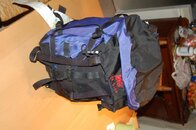
You now have a finished backpack that allows a backplate, STA, and tank straps to fit as shown in the following pictures. I don't think a wing will fit unless it's a remarkably small wing but it's possible to modify the design slightly (make the back flap wider) such that a wing can be captured as well.
plate position.jpgplateinplace.jpgpackback.jpgpackfront.jpg
 
Very cool!! Thanks sharing the idea. I may do a bolt on or wrap mod for my sidemount.
 
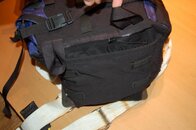
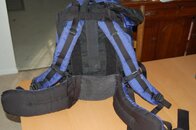
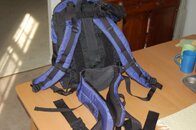
And here are two more pictures with the "standard" harness installed for when traveling without diving gear.
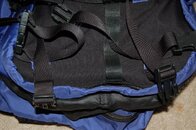
Basically the center webbing section of the shoulder straps velcros in around the horizontal daisy chain type straps visible in several of the pictures of the back flap. I modified the hip belt to also velcro in and then the hip belt gets attached to the should straps with webbing. The shoulder straps also have a "suspension system" webbing that attaches to the back flap over the back of the shoulder. The whole system is designed such that people of vastly different heights/back lengths can carry the same pack and the suspension system actually does a pretty good job of distributing the load to the back, rather than just the shoulders. REI designed this and I always thought it was a good system so I kept it in place in this modified pack.


standardharness1.jpgstandardharness2.jpg
 
Last edited:

Back
Top Bottom