Custom manufactured BP/W with plans and directions

Please register or login

Welcome to ScubaBoard, the world's largest scuba diving community. Registration is not required to read the forums, but we encourage you to join. Joining has its benefits and enables you to participate in the discussions.

Benefits of registering include

  • Ability to post and comment on topics and discussions.
  • A Free photo gallery to share your dive photos with the world.
  • You can make this box go away

Joining is quick and easy. Log in or Register now!

raftingtigger

Contributor
Scuba Instructor
Divemaster
Messages
1,307
Reaction score
817
Location
Woodland, CA, USA
# of dives
500 - 999
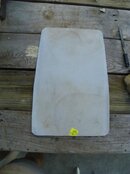
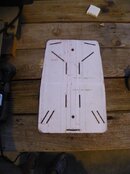
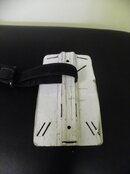
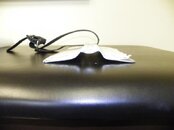
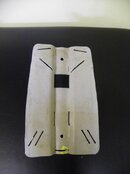
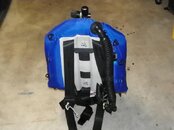
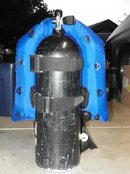
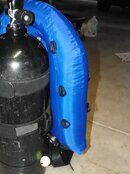
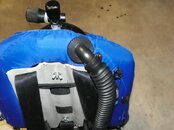
Purely for the fun and challenge of it I used plans found on ScubaBoard to make my own aluminum backplate. Then to use the backplate I also manufactured my own wing from scratch. This rig has been dive tested. The backplate/harness and prototype wing in the pool, and then the completed rig in Lake Tahoe on 2 dives. It performed flawlessly, with only one small change I want to make. That change it to route the lower right hand OPV dump string through on of my d-rings to make it easier to find/reach. I used a plain elbow, rather than a pull-dump, on the power assembly strictly for cost reasons. Eventually that will get changed. If I ever manufacture a larger capacity wing I will use heat-sealable nylon for my bladder. I have looked inside several brand new wings and that is what they are use for the bladder.

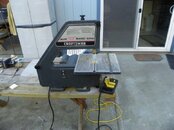
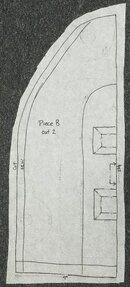
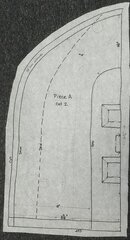
Materials and tools are common and should be available to most DIYers. I have made a PowerPoint for the backplate, and one for the wing construction. These explain and have pictures of each step, and include patterns. I haven't figured out how to attach them (they are currently too large) to this post. You can PM me and I'll email them to you. Cost for the whole project using NEW material (with the exception of the backplate aluminum) was under $140. Most of that was for the commercially made power inflator assembly and OPV.

I have confidence in the wing bladder. It is the same construction as the whitewater cataraft tubes I have been running on class 3 whitewater for the last five seasons.
 

Attachments

  • 100_0597.jpg
    100_0597.jpg
    34.3 KB · Views: 590
  • 100_0687.jpg
    100_0687.jpg
    29.3 KB · Views: 527
  • uWingz back.jpg
    uWingz back.jpg
    66.5 KB · Views: 504
  • uWingz side.jpg
    uWingz side.jpg
    59 KB · Views: 428
  • uWingz top.jpg
    uWingz top.jpg
    33.2 KB · Views: 431
  • uWings pattern piece B.jpg
    uWings pattern piece B.jpg
    109.2 KB · Views: 427
  • Wing Piece A pattern.JPG
    Wing Piece A pattern.JPG
    127.1 KB · Views: 419
Last edited:
Pretty cool!
 
Great to see

Terrific job
 
How did you cut out the plate and bend it? I have access to a water jet and press brakes up to 120 ton.

Really simple. The aluminum (~1/16") was from a heavy duty camp skillet ($2.15 at my thrift store, about $18 new). The outside cuts were with a table top craftsman bandsaw and the inside cuts were with a drill press and scroll saw. Works great with aluminum, but doubt you can do it that way with SS. As for the bends... I just used scrap lumber, clamps and a hammer. Also the back of a vise (anvil part) to flatten areas. If I do it again I will make a wooden template (my material of choice) for both sides (for at least the center bends) and then use C-clamps to force the bends. All told the BP took about 1-2 hours of work in one evening. All the slots were rounded with a Dremel tool and a roundover router bit.
 

Attachments

  • 100_0587.jpg
    100_0587.jpg
    38.9 KB · Views: 331
  • 100_0590.jpg
    100_0590.jpg
    30.7 KB · Views: 311
  • 100_0591.jpg
    100_0591.jpg
    53.5 KB · Views: 290
  • 100_0592.jpg
    100_0592.jpg
    53.1 KB · Views: 289
  • 100_0593.jpg
    100_0593.jpg
    53.3 KB · Views: 293
  • 100_0594.jpg
    100_0594.jpg
    38 KB · Views: 301
  • 100_0595.jpg
    100_0595.jpg
    53.8 KB · Views: 289
  • 100_0598.jpg
    100_0598.jpg
    34.2 KB · Views: 312
  • 100_0599.jpg
    100_0599.jpg
    23.4 KB · Views: 320
Awesome! Thanks for the great idea. I was wondering where I could get a low-cost aluminum plate! Sending a PM.

To cut costs as well, you could get a cheapo 2nd hand poodle jacket of ebay and then use the parts from that as a source for the inflator, OPV and cam bands. There's lots of ugly ones going for cheap :D
 
Never forget, the original backplates were made from Florida and Georgia stop signs. I've always wondered how they got the bullet holes out of them.:D
 
Never forget, the original backplates were made from Florida and Georgia stop signs. I've always wondered how they got the bullet holes out of them.:D

Didn't know that. Learned something new today. And learning is fundamental :)
 
https://www.shearwater.com/products/teric/

Back
Top Bottom