


Aardvark
Contributor
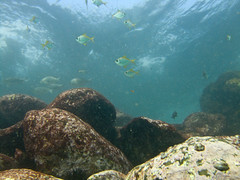
I know this is not a good shot, but I've been looking at it and trying to get the most out of it using Adobe Camera RAW 4.2 (came with PS Elements 6).
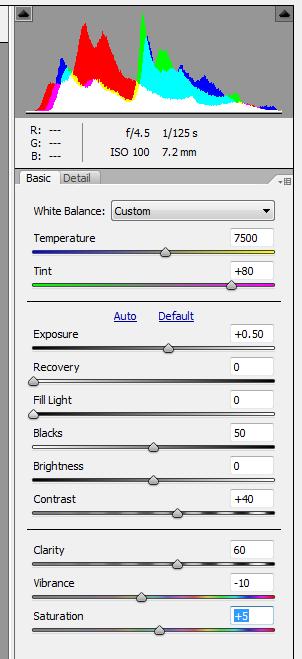
The first image is "as shot", the second with the adjustments per the basic tab. I couldn't see any appreciable difference in applying an unsharp mask on the detail page so that hasn't been done.
I have'nt been able to find a lot of information on RAW processing. Scubaboard search doesn't allow three character terms and other sites' RAW tutorials are basically "play and see what it looks like".
What I've done is started at the top and worked down. Trying and get the colour temperature right, then pump up the tint, then exposure, etc, working down the page.
What I'm wondering is, is there a better approach? The final result is as close to what I saw as I can manage, but still seems washed out and flat. Does anyone have any links to good RAW tutorials? Any other suggestions?

If LightRoom is the answer that's unfortunate. If I could afford it then I'd put the cash toward a wide lens and mount bracket; or a strobe.
The first image is "as shot", the second with the adjustments per the basic tab. I couldn't see any appreciable difference in applying an unsharp mask on the detail page so that hasn't been done.
I have'nt been able to find a lot of information on RAW processing. Scubaboard search doesn't allow three character terms
and other sites' RAW tutorials are basically "play and see what it looks like".What I've done is started at the top and worked down. Trying and get the colour temperature right, then pump up the tint, then exposure, etc, working down the page.
What I'm wondering is, is there a better approach? The final result is as close to what I saw as I can manage, but still seems washed out and flat. Does anyone have any links to good RAW tutorials? Any other suggestions?


If LightRoom is the answer that's unfortunate. If I could afford it then I'd put the cash toward a wide lens and mount bracket; or a strobe.
- I'm about 4 m deep, sun is behind me.
- Fuji E900 in an Ikelite housing, no strobe and flash suppressed
- F4.5
- 1/125
- ISO100

