The New Scuba Wagon... 2016 350 Transit XLT

Please register or login

Welcome to ScubaBoard, the world's largest scuba diving community. Registration is not required to read the forums, but we encourage you to join. Joining has its benefits and enables you to participate in the discussions.

Benefits of registering include

  • Ability to post and comment on topics and discussions.
  • A Free photo gallery to share your dive photos with the world.
  • You can make this box go away

Joining is quick and easy. Log in or Register now!

Thanks, Hyrum! Unfortunately, after some further measurements and consideration, the compartment under the seat is not appropriate for a second battery. Well, at least not a group 27 battery. So, now the house battery will be in the cabin in it's own little box. I wired the isolation Relay in the battery box. Here are some pics.

upload_2016-9-15_9-54-6.png


I used the lower left male spade connector in the right plug for my 12V signal to the Isolation Relay.

upload_2016-9-15_9-56-7.png


I tied the two batteries together with a 500 amp isolation relay (only connected while the van is running) and 4/0 cable.

upload_2016-9-15_9-58-57.png


With the lid on, it's all set to reattach the seat.
 
More progress. Here is the battery box installation...

upload_2016-9-16_16-43-29.png


upload_2016-9-16_16-44-4.png


I also finished up the rest of the insulation on both back doors and the side door, and I got the wood panel installed on the drivers rear door with two baskets up. I'll be adding a hanger for my cave helmet in a bit.

upload_2016-9-16_16-45-59.png


The bare door.

View attachment 381754

The initial load out
 

Attachments

  • upload_2016-9-16_16-41-17.png
    upload_2016-9-16_16-41-17.png
    402.3 KB · Views: 86
Last edited:
The build is progressing, although I sometimes have to take a step or two backwards to go forward. I have added the front upper panels, figured out the solution to the buckling of the front ceiling panel and painted the first two panels. That meant the two ceiling panels had to come out. They were far harder going back in this time. My "fix" for the buckling was to install a 1X2 vinyl element 3/8" above the aluminum angle I had mounted forward. The panel flexes so much that it was darn near impossible to get it in the slot. While both panels are painted, only the front one is in. I was whupped!

I also cut, painted and installed the passenger rear door panel. I even added two baskets and will add another when they get here tomorrow. I even opened up a hole to get to the door lock if I need to. Two more screws to add in addition to the basket and I'm done with it.

upload_2016-9-19_22-9-1.png


I also made a couple of drawer inserts so I can sit and use a drawer as a small table.

However, I also ran into a problem. I will be installing a DNX773S Kenwood GPS/Stereo with a Maestro Vehicle interface. This will give me a much bigger backup camera image and put the GPS about 30 inches forward where I can reach it and see it better. However, I have run into issues and perhaps someone can help. I had ordered the FO2 harness as prescribed by IDataLink, but I was sent an older version that would not work with this system. It only had two system plugs and not three. I found one all the way up in Hialeah, and since I didn't want to wait another week, I hightailed it up there. Incredibly nice people at the Best Buy there and he had precisely what I wanted. He also had the Ford antennae adapter as well as the XM portion which I thought came with the radio, but doesn't

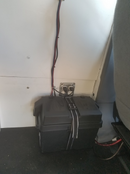
It's all good until I got home. I popped the upper dash apart since I wanted to match the plugs to the stereo. The two on the back of the stereo popped right out and fit the ones to the FO2. However, I couldn't get the one out of the 4.3" screen. Here's a picture if anyone has an idea how it should come out, I would be grateful.

upload_2016-9-19_22-20-31.png


upload_2016-9-19_22-21-21.png


So, what am I missing? Why won't this turd just pop out?
 
Nevermind... I see what has to be done.

EDIT> That was it. You push in the top center and swing that lever looking piece over and down. That part of the harness fits as well, so I'll be able to finish installing this in the morning. Yay!
 
Last edited:
  • Like
Reactions: D_B
Netdoc, I thought of you yesterday when I was out at our local quarry with DRIS (they're my LDS) for OW dives and saw someone with a Sprinter-type van. I even peeked inside to see how it was tricked out. :)
 
Out of curiosity, why not full panels on those doors?
 
Out of curiosity, why not full panels on those doors?
The bottom portion looks pretty darn good already, and I really didn't want to mess with speakers, etc. I might pull them off at some later date to see if I can put insulation in there. But they will go back, as is. The paneling covers the insulation and gives me a nice mounting surface. My tanks could possibly hit anything lower than those baskets, so why go lower?

Up at 5:45 this morning, ready to finish the GPS/Stereo install. These are multi-stranded wires, so crimping and not soldering is called for. Being a bit anal about crimping and especially since these wires are not marine grade (tinned), I am using clear glue lined heat shrinkable tubing. The glue really seals out the elements and you heat the tube until you see the color change on the insulation and the glue come out a bit like this:

upload_2016-9-20_7-30-14.png


When it comes to wiring, methodical and neat help to make a quality job that will be trouble free for years. Here is the finished bundle...

upload_2016-9-20_7-32-18.png


Here is a pic of the three vehicle connectors. The one on the far right is missing on the obsolete FO2 harness and ties in the monitor feed to the Kenwood.

upload_2016-9-20_7-36-18.png


With the sun up, it's time to go install the unit in the dash!
 
  • Like
Reactions: D_B
Netdoc, I thought of you yesterday when I was out at our local quarry with DRIS (they're my LDS) for OW dives and saw someone with a Sprinter-type van. I even peeked inside to see how it was tricked out. :)
What? No pics??? :D :D :D
 
https://www.shearwater.com/products/teric/

Back
Top Bottom